-
-
Please refer to the Part Number: 31539, Tailstock Option-4th Axis-TMC document that is provided at the bottom of this guide for more information regarding installation of the tailstock.
-
Customers are responsible for tramming both the 4th Axis unit and the tailstock based on their operations.
-
-
-
Clean and degrease the worktable by wiping it with a clean rag and WD-40.
-
Upon proper installation of the 4th Axis unit on the TMC, the tailstock must be set up across the 4th Axis on the same T-slot on the worktable. Both the 4th Axis and the tailstock have a key to drop in and slide to any position, on any T-slot.
-
Make sure that both the keys for the 4th Axis and the tailstock are aligned with a reasonable amount of distance away from each other to perform work based on the customer's operations.
-
Set up tailstock by installing (A) the two T-Bolts (Part Number: 23792) onto the worktable first, then (B) the tailstock (Part Number: 27061-1), then (C) the two washers (Part Number: 23794), and finally, (D) the two flange nuts (Part Number: 23793) on the front and back of the tailstock. Do not overtighten the assembled nuts onto the worktable.
-
-
-
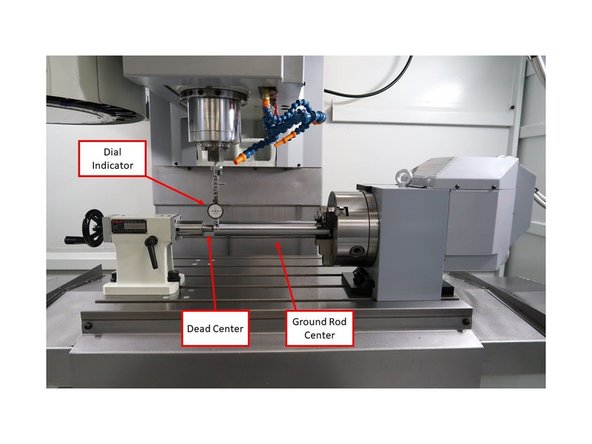
If the customer requires more precise measurements, it is highly recommended that they use a ground rod center that is inserted into the chuck, and is held by a dead center on the tailstock end in order to conduct measurements with a dial indicator. This would be based on the customer's needs.
-
Cancel: I did not complete this guide.
One other person completed this guide.


