Introduction
If the Turning Center is not installed properly, its bed may become twisted. Even a slight amount of twist will move centers out of alignment, and result in inaccurate work. Adjust the machine leveling under the following procedures, and repeat these steps to achieve a correctly leveled machine.
Tools
Parts
No parts specified.
-
-
Remove the back panel of the Turning Center by loosening the six (6) screws on the left and right sides of the panel, as well as removing the three (3) screws on top of the panel.
-
Move the turret to the center of travel on both X and Z Axes.
-
As shown on the image, place the two (2) precision bars on the left and right sides of the box ways at the back of the machine.
-
Make sure to clean both sides of the box ways before placing the precision bars.
-
Mount a flashlight at the back of the machine in order to get more visibility while leveling.
-
-
-
Set leveling pads below the four (4) corner leveling screws, and use these leveling screws to lift the machine approximately 3" above the ground from the bottom of the casting.
-
Make sure that all of the above leveling screws have an equal amount of tension as well.
-
Raise the four (4) center leveling screws, so that they are off their respective leveling pads for now.
-
-
-
Begin leveling the Turning Center from the back of the machine:
-
Leveling the back of the machine affects its absolute level.
-
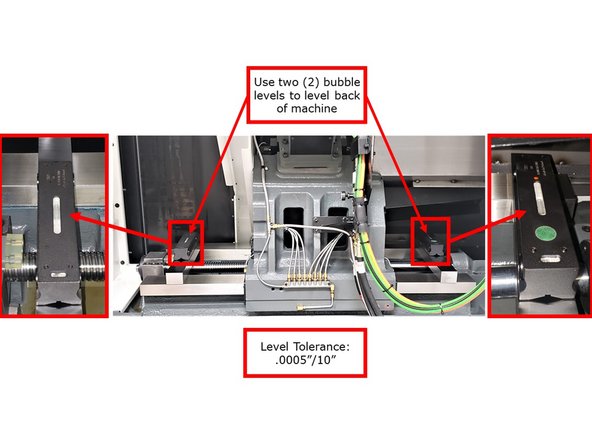
Place two (2) bubble levels on the two (2) precision bars that are on the box ways on both sides of the turret, as shown on the image.
-
Check the level of the machine on both bubble levels to be within the tolerance of .0005"/10".
-
Using either a 26mm socket with ratchet or 26mm open end wrench, adjust the four (4) corner leveling screws until the bubble is centered on both levels.
-
Figure out the pressure points on the corner leveling screws, and tune them within tolerance. In addition, make sure that there is enough pressure on the leveling pads.
-
Once the machine achieves the .0005"/10" specification on both levels, remove both the bubble levels and the precision bars from the machine.
-
-
-
Calibrate the Digital Level before using it to level the inside of the machine:
-
Place the digital level on a clean granite surface, and turn it on.
-
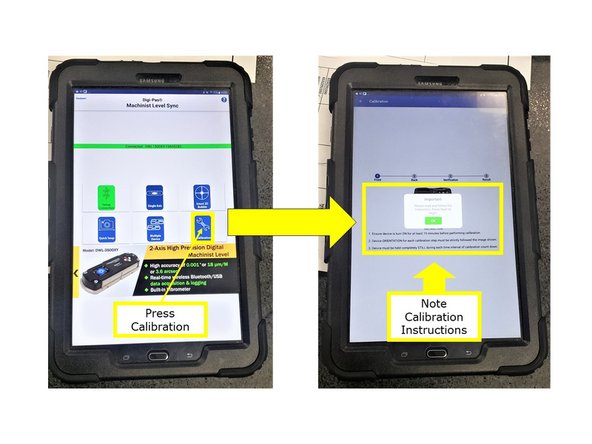
Using a tablet or smartphone device, enable the Digi-Pas Machinist Level Sync app, and establish a Bluetooth connection with the digital level by pressing "Setup Connection" icon, as shown on the image.
-
The device will be identified by a model number and serial number that are located at the bottom of the unit.
-
When the "Setup Connection" icon turns green, then the connection is successful.
-
Make sure that the digital level had been turned on for at least 15 minutes before proceeding with the next steps.
-
Press "Calibration" icon on the app's main menu, and the "Calibration" window will appear. As shown on the image, note all instructions that on the screen, and press "Start" to begin.
-
-
-
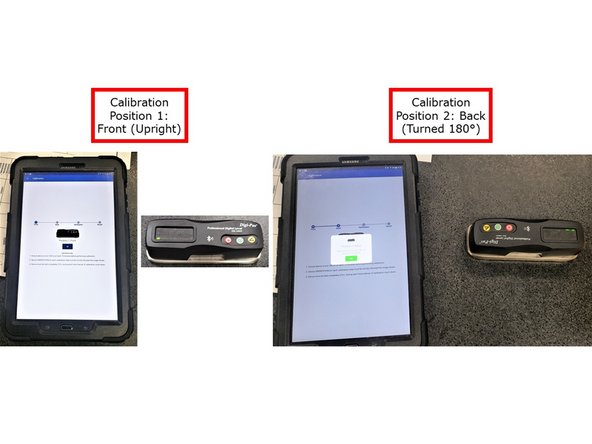
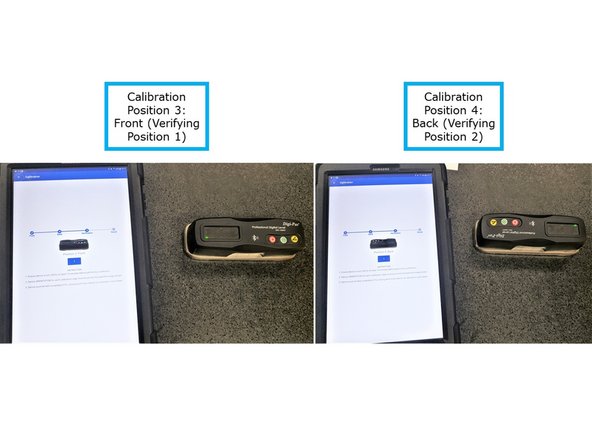
The Digi-Pas Machinist Level Sync app will calibrate the digital level from four (4) positions:
-
As shown on the image, the app will initially calibrate the digital level from "Position 1: Front" (the device is placed on an upright position) and "Position 2 : Back" (the device is turned 180°).
-
Next, in order to verify the previous two (2) positions, the app will recalibrate the device from its upright position (Position 3: Front), and also while it is turned 180° (Position 4: Back) again.
-
For each of the above positions, the app will perform a calibration countdown. Please note that the digital level must be held completely STILL during each time interval.
-
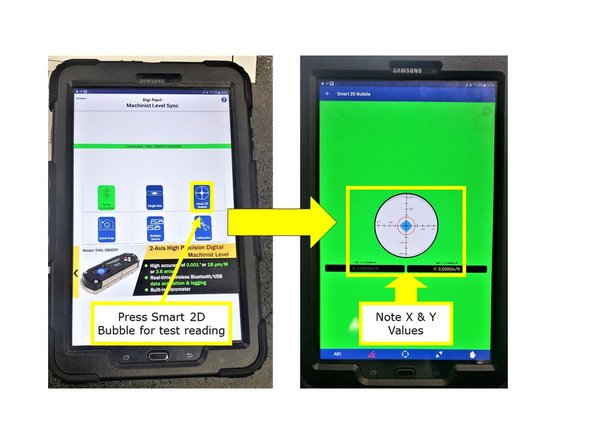
Once calibration is complete, press the "Smart 2D Bubble" button on the app's main menu for a test reading.
-
The "Smart 2D Bubble" feature allows you to view 2-axis angle/leveling measurement simultaneously in a graphical "Bull's eye" (with auto range feature) and numeric formats: ° (Degree), mm/M, and In/Ft units.
-
-
-
Begin leveling the turning center from the inside of the machine:
-
Leveling the inside of the machine affects twist.
-
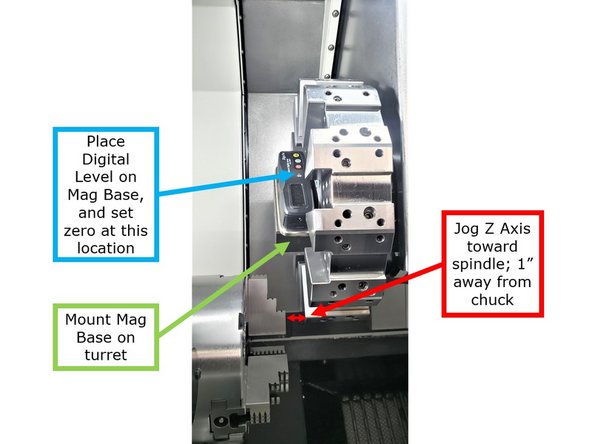
Jog the turret along the Z Axis toward the spindle, and approximately 1" away from the chuck, as shown on the image.
-
Mount a magnetic base on the turret, as shown on the image.
-
Place the calibrated digital level on the magnetic base, and set zero at this location.
-
In addition, adjust the digital level to display "in/ft" unit.
-
-
-
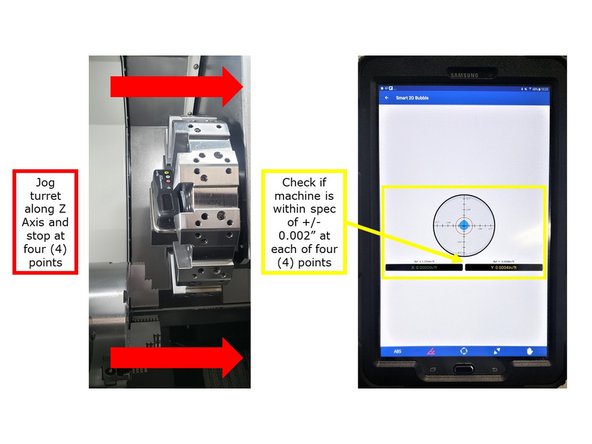
In order to check for twist, move the turret along the entire Z Axis travel, away from the spindle.
-
While doing so, you will be stopping at four (4) different points along the Z Axis; jog to and stop at every 100mm (approximately 4") on the travel.
-
Use the digital level to check if the machine meets the tolerance of +/- .002" for both X and Z Axes at each of these four (4) points.
-
If needed, adjust the four (4) corner leveling screws in order to meet the above required tolerance.
-
-
-
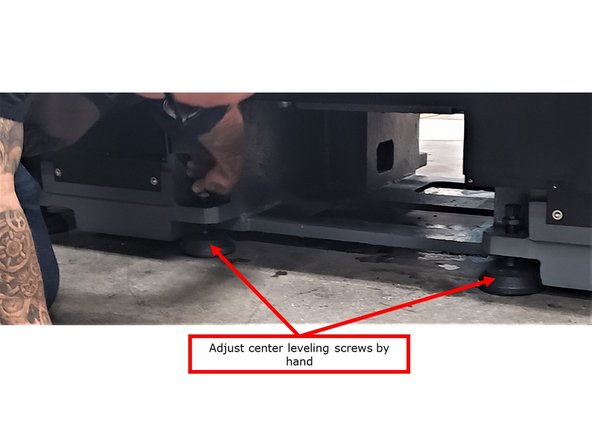
Once the machine's level meets the required tolerance, lower the four (4) center leveling screws onto the pads by hand, and then use a wrench to tighten each screw by only 10°.
-
Do not overtighten these leveling screws as the level of the machine will change.
-
-
-
Verify that the machine is properly leveled by moving the turret along the Z Axis and checking for twist.
-
Adjust the leveling screws as needed.
-


