-
-
Power and all data cables should be removed from the CNC before proceeding.
-
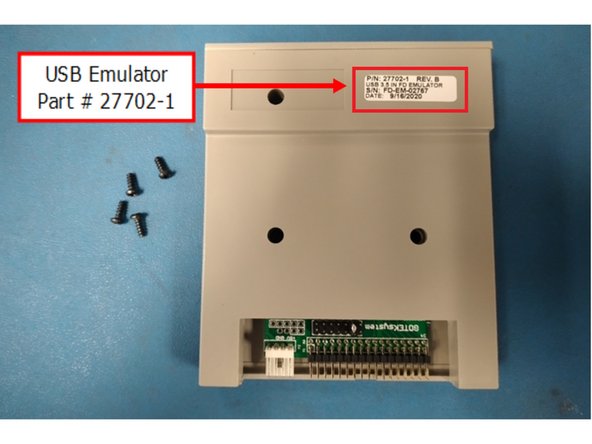
USB Emulator Part Number: 27702-1 includes four (4) screws as shown.
-
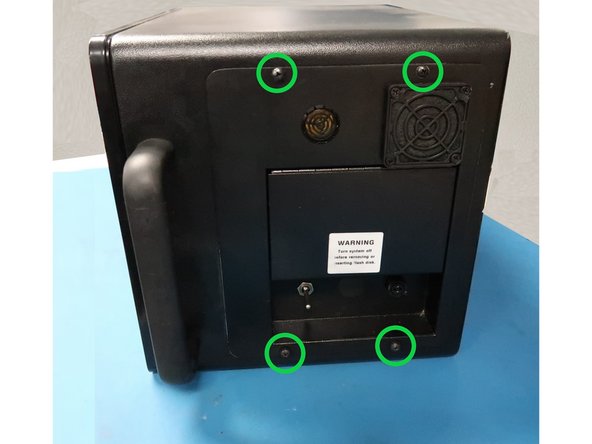
Remove the four screws from the right side of the pendant.
-
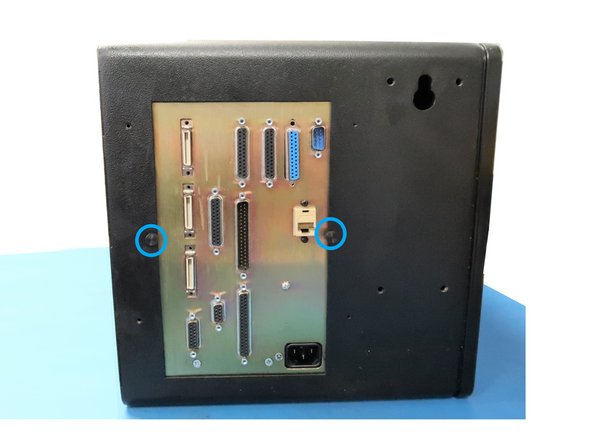
Remove the two knurled screws from the left side of the pendant.
-
-
-
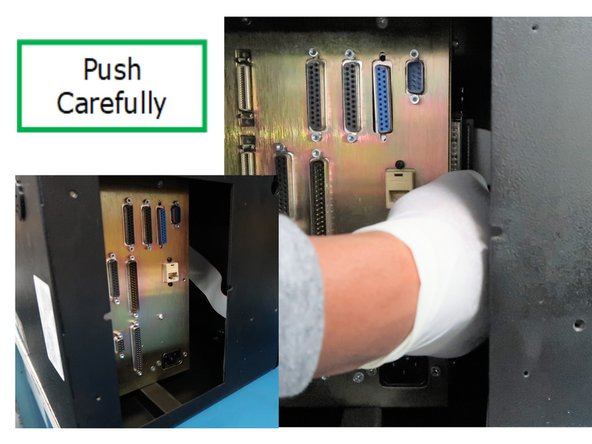
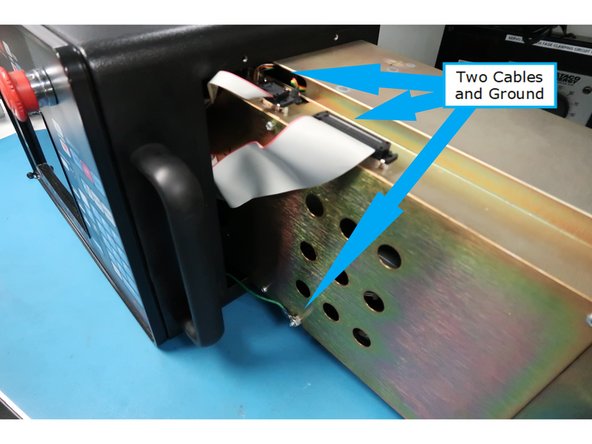
Caution: Disassembly of the pendant requires sliding out the internal chassis. You must use caution when sliding out the chassis because of four wired connections from the chassis to the front of the case. This internal view shows a short cable on the left side of the face plate.
-
From the left side, slide the chassis out of the pendant just enough to sneak your hand inside to disconnect that short cable.
-
Once the first cable is removed, continue slowly sliding to uncover three more cables on the other end and disconnect them.
-
-
-
Remove the seven screws around the perimeter of the chassis cover. You can leave the ground nut since it is connected to the case.
-
The data connector needs to be loosened from the cover. The jackscrew near the circular opening needs to be removed. Some of them have a nut on the bottom which may require a wrench for removal. Others have threads in the connector itself, just requiring removal of the jackscrew. Peak on the bottom or feel which one is present and remove it.
-
Just loosen the other jackscrew and slide the connector toward the opening which falls into the chassis. This will disconnect the cable from the cover without damage to the cable and connections as shown in the inset photo.
-
-
-
To remove the floppy drive, remove the two screws from the front of the chassis while holding the floppy drive. It should be easier to remove the floppy drive data and power cables as a result.
-
With the floppy out of the chassis remove the brackets and attach them to the new USB emulator with four screws.
-
-
-
The floppy drive brackets are now on the USB.
-
Connect the power and data cables from the circuit board making sure the data cable has the correct polarity (Red stripe attaches on Pin #1).
-
Install into computer chassis with brackets and cables in place.
-
To complete USB upgrade, reverse disassembly process.
-