-
-
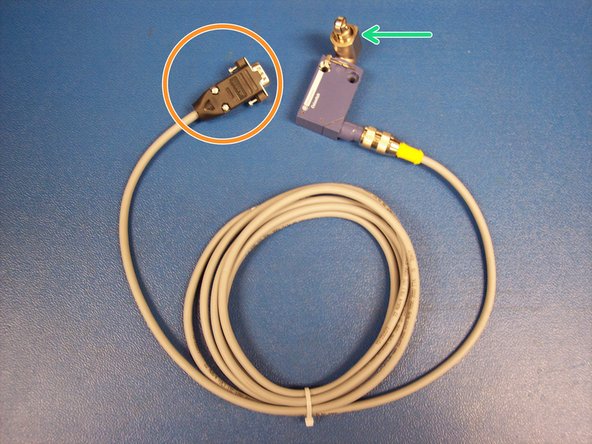
Verify switch cable is plugged in and fully seated on both ends.
-
If switch does not function, proceed to step 2 below.
-
-
-
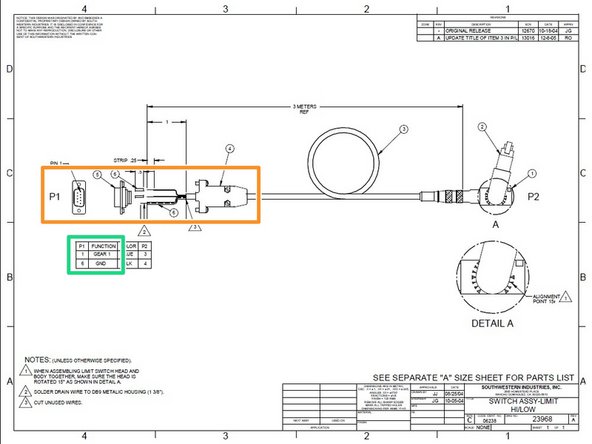
Verify that the switch head is tilted at a 15 Degree angle per the Assembly Drawing.
-
If switch is tilted properly and still does not function, proceed to step 3 below.
-
-
-
Unplug the "D" connector, P1, from the machine.
-
The HI/LO switch is a NO switch, which means "Normally Open". When the switch is pushed, it closes the circuit and should read near 0 Ohms (continuity)
-
Using an Ohm Meter, verify that the circuit between Pin 1 and Pin 6 on P1 is open (no continuity) when the switch is in its normal state (not pressed)
-
Press the switch and verify that there is continuity between the same two pins.
-
If the switch fails the test, replace the entire assembly, P/N 23968.
-
Almost done!
Finish Line


