
-
-
Verify controller is connected to the indexer, 120v supply, the computer module, and the 2 cables to the indexer
-
Verify air line is connected and the supply is at 90PSI
-
Turn on the power on the rear of the unit and release the "E-STOP" located on the front of the unit
-
Once powered up the initial screen will appear.
-
Press "CYCLE START" to get to the manual mode screen.
-
Press "ZERO RETURN" to home the indexer. The display will be in the program screen, once homed.
-
-
-
To enter manual mode press a "JOG" key
-
If needed, use the jog key to move to a new desired home position and press and hold the "CLR" key for 3 seconds to set a new home position.
-
In manual mode, the "P" display refers to the angular position from home.
-
"JOG SPEED" references the speed or the increment of movement when using the jog keys.
-
The jog speed can be changed by entering a number 0-9. See chart above. Pressing the jog button once will rotate the degrees per step and holding the jog button will rotate at degrees per second.
-
-
-
Go into program mode by pressing the "MODE RUN PROGRAM" Key
-
To clear the current program press and hold the "CLEAR-ZERO SET" key for 5 seconds.
-
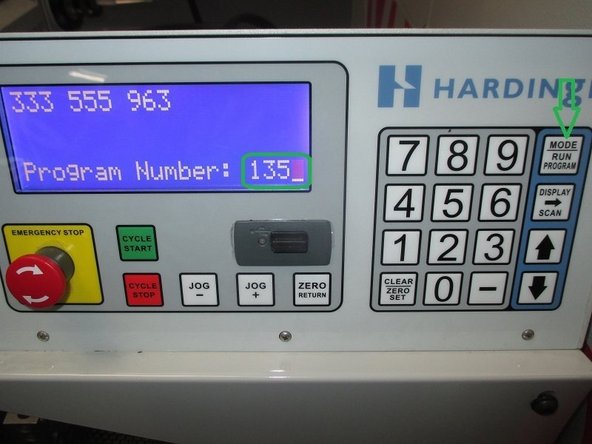
Enter program mode by pressing the "MODE RUN PROGRAM " Key to access program mode. The readout should have 4 lines of text.
-
-
-
Press the "DISPLAY SCAN" key to move the cursor to the "G" and press the "-" key. Input your new program number and press "Mode" key to begin.
-
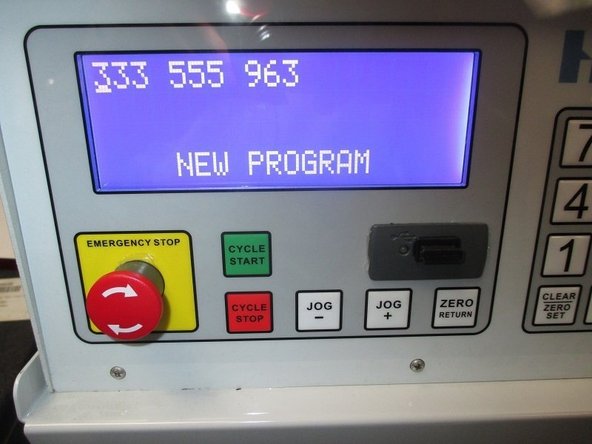
The screen will read "NEW PROGRAM" and then enter program mode.
-
-
-
Verify you are in program mode by pressing the "MODE RUN PROGRAM " Key if required to access program mode. The readout should have 4 lines of text.
-
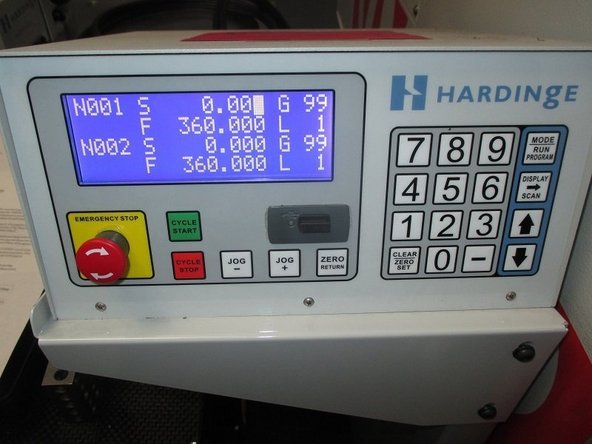
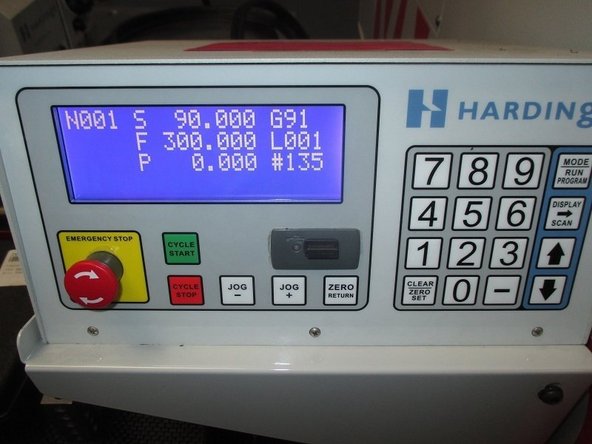
N001 is step 1, S is angular position, G code for function, F for feed rate, L for loop count. then step 2.
-
Input "S", "G", and "F" for each move of the indexer. Note; this model indexer has a 300.000 max feed rate.
-
There are 4 main "G CODES" used, G28 return home, G90 absolute position, G91 incremental position and G99 end of program
-
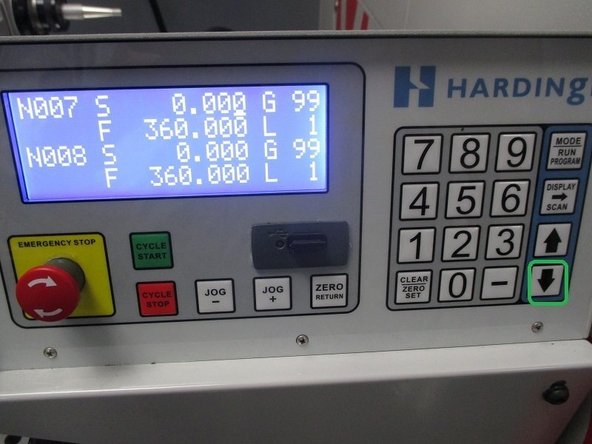
You can move between text with the arrow keys and use up and down arrows to move to the next 2 lines of program.
-
The last 2 steps of program on the indexer, should be G28 and then G99
-
-
-
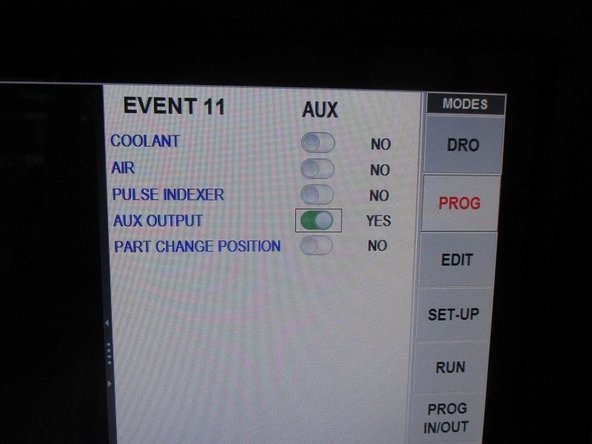
In order to use the indexer, you must have the auxiliary function option.
-
When programming the VMC2; press the more soft key, and then auxiliary function and slide aux output key to yes.
-
This step is required to have the indexer rotate per the program in the indexer.
-
Repeat the aux function for each time you need to index the part.
-
-
-
Enter run mode
-
Line 1 shows the (N) step, (G) G-CODE. (P) Commanded position. Line 2 shows the (F) commanded feed. (L) loop count. (PR) Program number. Line 3 shows the current position and Line 4 reports any alarm messages.
-
Press cycle start on indexer control as required until step 1 is active on the indexer run screen.
-
Run RMX control as normal.
-
-
-
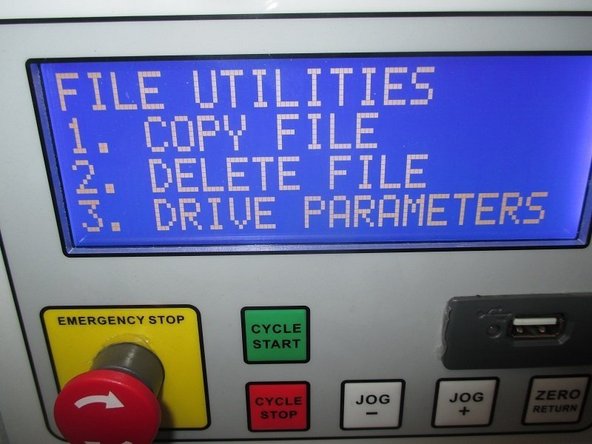
While in program edit mode, press and hold the "SCAN DOWN KEY" for 3 seconds to enter the FILE UTILITIES menu.
-
Follow directions on screen to move files between memory and USB device.
-


Cancel: I did not complete this guide.
One other person completed this guide.